As winter was coming to an end I could see my garden beginning to green, blossoms opening and the days slowly getting longer. I had things all planned out - the first week of spring was going to be a flurry of seed sowing, weeding, mulching and turning of soil with my homemade compost. None of it happened of coarse. My first set back was strep throat, my youngest got it then I came down with it myself. It's the sickest I've been since I got the flu when I was 15. Then there was a trip to see my family which was meant to be a well deserved break after all my gardening, but, after a week of strep it was bliss. Then there was a week of the kids vomiting followed closely by another cold virus that passed from the kids to both Mamma and Pappa Bear. Not the start to spring I had planned.
One thing I did manage to sneak in here and there was stripping back our old office that will soon become my scullery. I'm so excited. I love bright colours and being a space I can play around with I'm thinking turquoise.
 | ||
| All stripped ready for a sugar soap scrub to get rid of any wallpaper paste then a plaster, sand and prime. |
 |
| Turquoise, red and white - with custom coloured mason jars. Bright and friendly. |
You need:
Newspaper
Scissors
Toilet Roll
Wooden Spoon
Seedraising Mix
Seeds
Step 1: Cut newspaper into about 12-15cm wide strips, horizontally.
The local paper and the Herald cut into 3 strips perfectly.
The local paper and the Herald cut into 3 strips perfectly.
The papers are still folded in half in the picture below.

Step 2: Roll one strip around a toilet roll
with about half of the paper on the roll and half off

Step 3: Twist the end like a candy wrapper

Step 4: Push twisted end into the tube
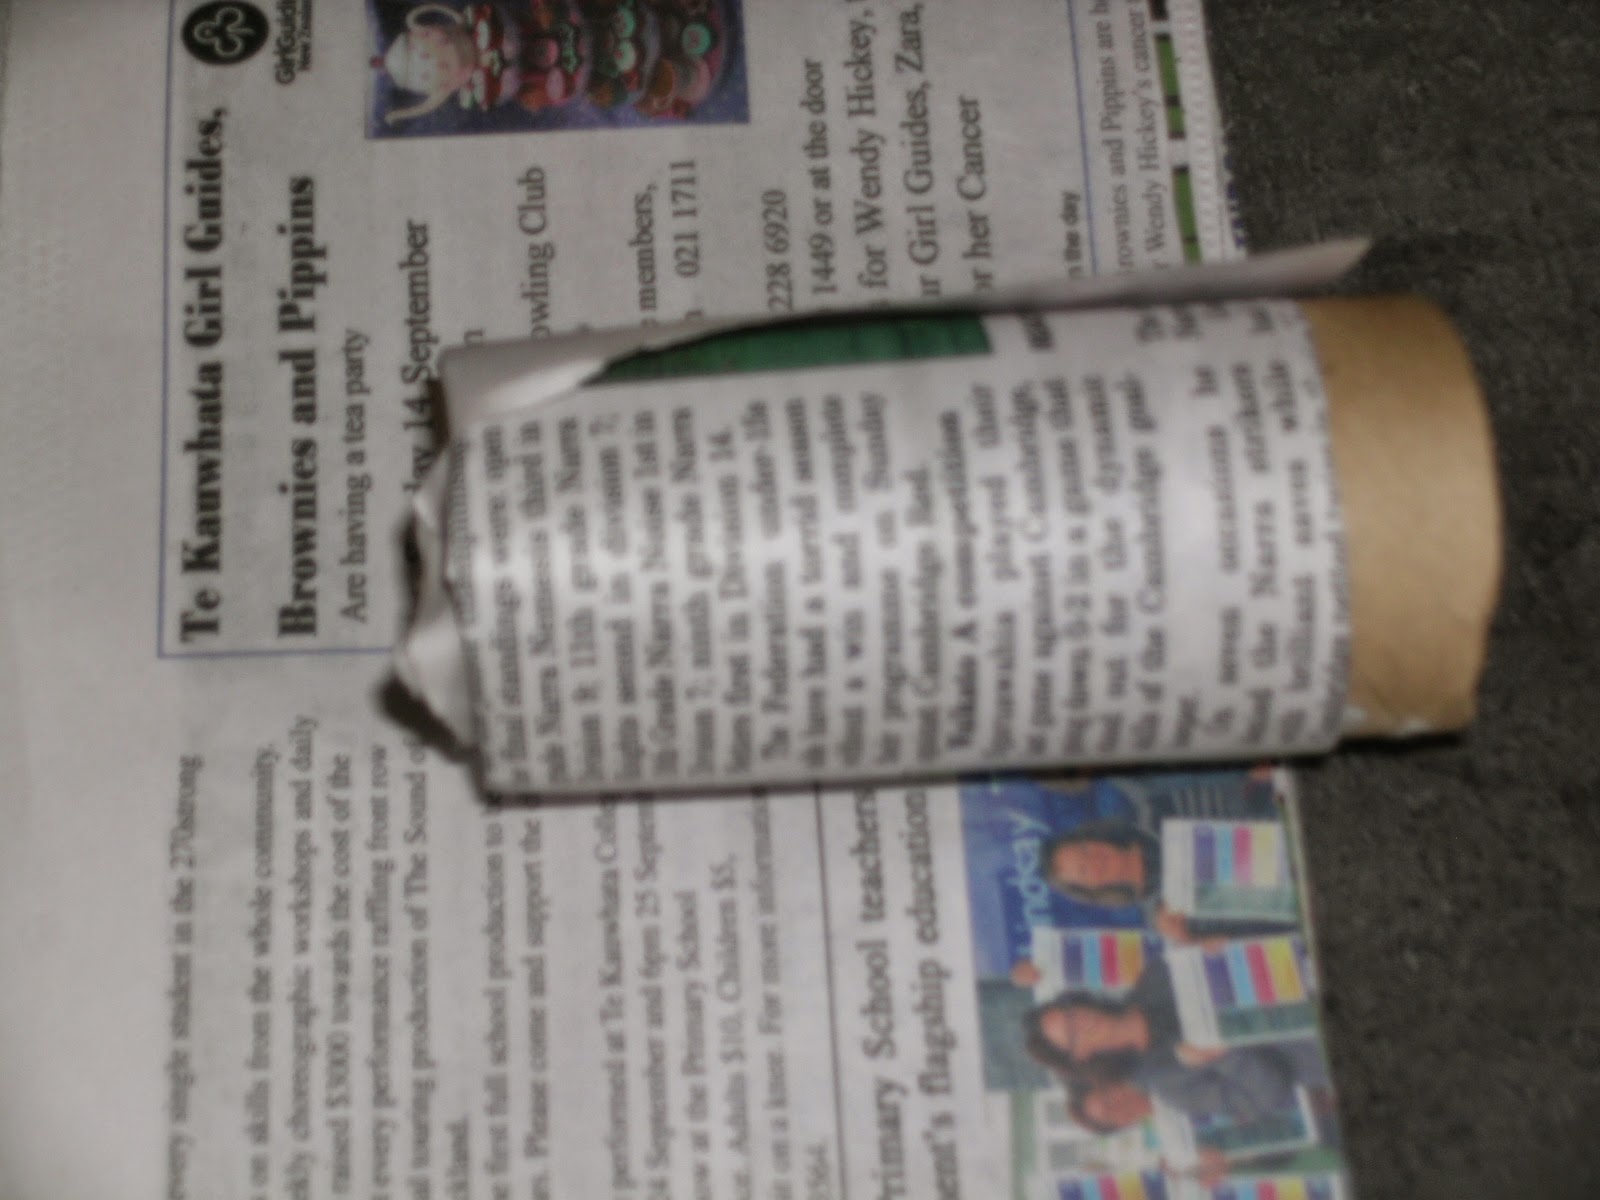
Step 5: On a flat surface push base flat with the handle of a wooden spoon.

Step 6: Slide off the tube and repeat, repeat, repeat...

Step 7: Fill with soil and seeds then water and wait for the magic to begin

When your seedlings are ready to go into the garden you can pop the entire paper pot in the ground and the plants won't suffer from moving like they do when evicted from other types of plastic pots. I planted just a few seeds of lots of varieties today, corn, watermelon, gherkins, cucumber, basil, beans, broccoli, celery to name a few. So we'll have a good selection and not too much of anything over summer.
One more thing, there is one thing I paid for, I brought a huge pack of large ice block sticks some time ago to make labels. You could use them whole but if you're cheap like me you'll want to cut them in half before labelling and pushing down the side of your pots. Happy gardening!

No comments:
Post a Comment
Feel free to comment - I love to hear from my readers